1 |
 |
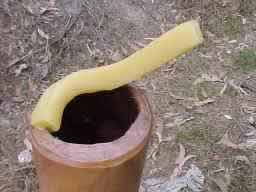
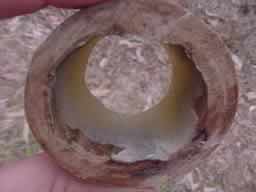
Let's start off with a didj without any mouthpiece. If yours has any beeswax on it, simply scrape it off as well as you can.
When doing this, be careful not to damage the varnish which protects the wood. |
2 |
 |
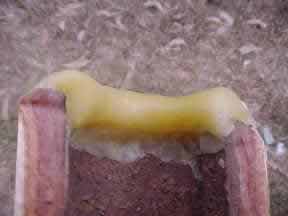
Now you take a piece of soft beeswax and start pushing it onto the inside corner of the top opening in the didj. (The top of
the didj is always the side with the smaller diameter). Note how well the wax is pushed onto the inside edge of the didj. |
3 |
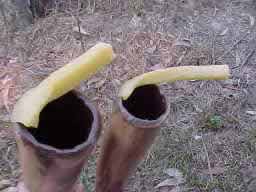 |
It will make it much easier if you start of with the right amount of beeswax. For different size holes you need different size
beeswax pieces to start with. (the bigger one will only be enough to go about 3/4 around the didj) On these two didjes I squeeze the wax already
into a triangular profile as I go along. (compare with last photo) |
4 |
 |
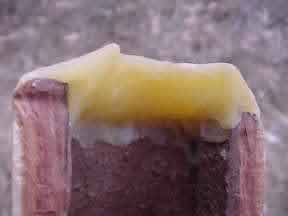
Keep pushing the wax around the hole. As you go along, thin the wax if needed to avoid having to much. Imagine the final size
of the hole you want to end up with (about 30-40 mm across). Having too much or too little wax will make it hard or impossible to end up with
the right size hole. Note the profile of the wax where it is pressed onto the wood. It is achieved by shaping the wax between thumb and forefinger
as it is applied. |
5 |
 |
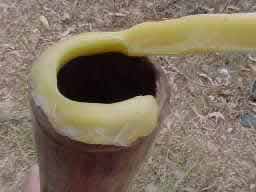
Join the circle. Note how well the mouthpiece is already shaped. Keeping the approximate size and shape of the final hole in
mind during this first stage saves lots of correcting later on. |
6a |
 |
Simply take the excess off... |
6b |
 |
Or...If the beeswax piece is the right size, you simply join the ends... |
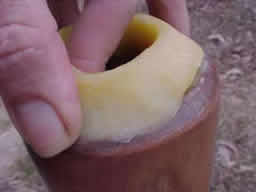
7 |
 |
Now you want to press the wax against the inside of the didj. This is best done by pushing the wax downward allowing it to
peter out (we do NOT recommend that you cut your didj in order to check your mouthpiece). You will have to feel with your finger as you push
the wax against the timber that you end up with a continuous seal |
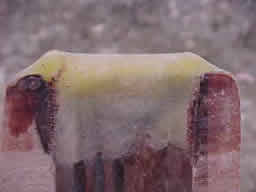
8 |
 |
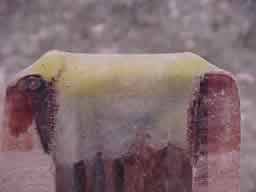
Here an example of what it shouldn't look like if you could see the bottom of the mouthpiece. Note the gaps between wax and
timber, specially in the 4 o'clock position. |
9 |
 |
Another view showing the thinning of the wax towards the bottom. You still want to achieve a good seal all the way down. |
10 |
 |
Once the inside is well sealed, you want to use your thumb to seal the outside edge of the wax onto the timber... |
11 |
 |
Insufficiently sealed areas like this might create air leaks and any such leak will make it difficult or even impossible to
play the didj. (Even a tiny hole will affect the sound quality of your didj) |
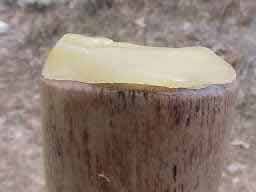
12 |
 |
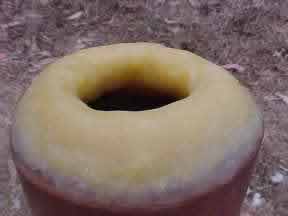
Here the outside is well sealed but the profile of the mouthpiece is too high... |
13 |
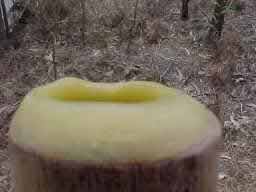 |
After another round of squeezes the profile is right. Note the hills and valleys of the inner edge. It will be difficult to
get a good seal with such an irregular inner edge. So use little pulls and pushes to even out the hills and valleys... |
14 |
 |
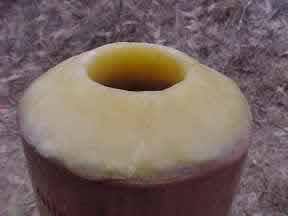
This is how you want the top edge of the mouthpiece to look like. |
15 |
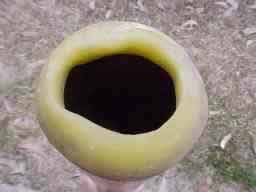 |
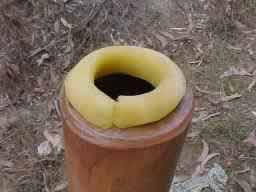
Similarly you don't want to play a didj with such a deformed hole |
16 |
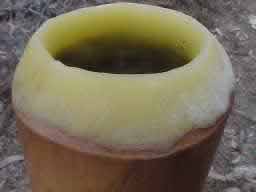
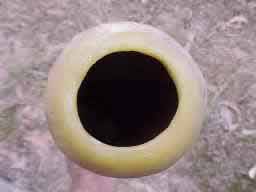 |
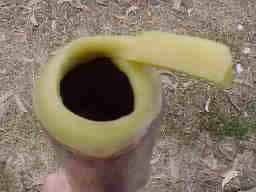
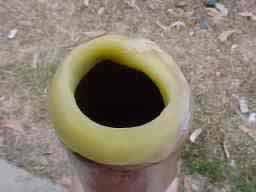
Looking onto the hole you want to end up with an evenly round or slightly oval inner edge which is about 30 to 40 mm across. |